One seed can start a garden, one candle can light a room, one step can begin a journey, one conversation can start a friendship, one smile from a handmade card can lift one's SPIRIT!

Thursday, June 28, 2012

ColourQ # 143

I am trying another card for the ColourQ challenge...Here is the inspiration photo for this color challenge:  and you can go HERE to see all the DT's inspiration photos...
                    Paper:  all PTI
                    Stamps:  Beautiful Blooms, Technique Tuesday
                    Ink:  pure poppy, blueberry sky, lemon tart, soft stone                                                                                                                                         

Wednesday, June 27, 2012

Dutch Card Lovers...a card

I am not even Dutch...but I have some very good and kind blogging friends from the Netherlands and this sketch is from Cornelie, I was impressed with the sketch, with her card, with Jose's card and also Marjan...they are talented ladies and I don't compare, but it is always fun to get a reaction from them when I enter my card in one of their challenges!!  First, here is the sketch:  And go HERE and scroll down a bit to check out these awesome cards from the girls mentioned above!
As you can see, it has a lot of layers...and this does take thought, but I followed along and this is what I came up with:
 My background paper is from Memory Box:  brioche...and I used a Hero Arts Lattice background stamp over both sheets.  The butterfly die is one that Jose sent me for my birthday...love that big butterfly and all its swirls, then I die cut a smaller Butterfly Dreams die from PTI and adhered it on top...the little sentiment which says: happy SUMMER is from Friendship Jar:  Summer...So how did I do girls??                                                                                               

Retro Sketch # 17

Another card...I am finding "lost" stamps...not really lost, just lost in the pile of them!  I saw the ribbon stamps and thought that would be cool in these red, yellow, blue colors...so away I went and this is what I came up with:
And guess what?  Today we had the sun!  Yeah...seemed like the right stamp to use in honor of being able to sit in the sun for a lunch break...this is a Technique Tuesday stamp and sun...the colors are all PTI.  And if you want to play along here is the sketch and the link HERE will take you to the site...

Tuesday, June 26, 2012

Retro Sketch # 17 and ColourQ Challenge

Here is the sketch for this week from Retro Sketches:
you can go HERE to check out all the inspiration and to link up your card for this week's sketch.  I kept mine really simple:
The sentiment and the bird are from PTI's Happy Trails...thanks for taking a look!  I am also going to link this to the colourQ challenge # 143...except I have NO gray...so I am substituting kraft!

Make It Monday #72: Step It Up - Embellishments

This is my Stepped Up card...stepped to the MAX!  I die cut the leaves from Sending You (both the large and small leaves) I stamped the large leaves with Berry Sorbet ink the smaller leaves with Ocean Tide, the center of my flower is the die cut and stamp from Simple Sunflower.  I punched a circle to attach all these individual pieces to form a 5 petal flower.  I placed it on the card (which is rustic cream embossed with the canvas EP) and decided to add some leaves, so I used Turning A New Leaf die and the ocean tide paper.  I decided it needed another layer...so I tried the Mendhi Medallion...not so much...tried a few of the pieces from iconic images...again, not quite right...tried the big flower stamp from Sending You and that wasn't right either...then I spotted Embellishments and thought...AHA..this is it!  So I placed my flower on the paper and with a pencil I marked the tips of each petal, then I took it away and proceeded to stamp one of the images from the Embellishments Stamp set five times around the pencil points...but first I stamped off once before actually stamping the image on the paper.  I LIKE IT!!  And the sentiment is from Garden Variety.

Thanks for taking a look!

Monday, June 25, 2012

Papertrey June Blog Hop Challenge Card # 2


 The June Blog Hop is on...here is a second card I did for the blog hop and here is the inspiration piece...I chose to go with the colors this time...Tweet Talk bird, picket fence from Little Bitty Bird Additions, and the Wrought Iron Background stamp...Aqua Mist and Harvest gold paper..

                    June-blog-hop                                                      Thanks for taking a look...there are some wonderful cards in the blog hop!                 

Papertrey June Blog Hop Challenge

I took the inspiration from two of the pillows...I used Aqua Mist background paper and stamped TANL and  flowers from Daydreamer with New Leaf Ink.  I took a strip of Lemon Tart paper and ran it through my crimper to give the effect of a pleat...topped it off with a piece of new leaf satin ribbon (sure wished I had a narrower ribbon in that color!)  I added the lemon tart dots with a 5/8 hole punch...the "hello" is from Happy Hydrangea.


June-blog-hop
This is the inspiration for the card from Nichole's blog to get all the details go HERE

Thanks for taking a look...off to see more inspiration....

Sunday, June 24, 2012

A Year of Flowers Collection

I tried inking these stamps up a long time ago...I guess I struggled with "coloring" them, because they are so small...and I do not have a very steady hand!  So I just put them away...and today I decided I needed to get them out and make something with them...so I did some Clean and Simple cards (well, okay a few of them have a little more to them, but not much, I kept them all pretty simple...that's me...quick, easy, done...


I guess if I have made six cards, then I have six more flowers to use!  This was a fun day...just played in my room most of the time...took a few breaks...DH and I were suppose to put a Closet maid into the guest closet...but you know, things are never the way they are suppose to be...something always has to be done before doing what we want to do...in this case, it means routing out some grooves in the base molding for the DIY closet drawer and shelving unit to sit on (our molding is rounded at the top!)  So that left me free for making cards all day!  A little silver lining....

Saturday, June 23, 2012

Make It Monday #71: Bordered Sentiments Another card

I needed a birthday card for my aunt who is turning 93 in just a couple of weeks.  So I decided to play my hand at the MIM again and make her a card.  I used "Sending You" stamps and the sentiment is from Beautiful Butterflies.  The yellow paper is from PTI, Bitty Box Basics, the polka dot paper is MME: lemon Twist.  This should do it for the MIM...it was a fun technique and one I hope to remember for future cards!

Friday, June 22, 2012

The final Baptism Card

A while ago I mentioned a tri-celebration:  a 40th anniversary, a 100th BIRTHDAY, and a first grandchild's baptism...I made the first two, but had some trouble coming up with something for the christening...I do not have any stamps that would qualify for this kind of card...I went online and looked at the kind of cards one could buy, I decided to use this sentiment:  "Called by NAME to be a child of God"...my other problem is that I CANNOT use PTI cardstock through my printer...so I had to print the sentiment on regular cardstock (staples 67 # weight) and then cut it down.  I decided to use a cross from Verve and just kept it simple with that and the sentiment.  I did add a bow and some stitching around the pink paper and then adhered it to white card stock.  One thing I want to mention is that my dimensionals are from HERE  if you look on her right sidebar you will see a link for her etsy shop and the dimensionals...these are not as thick as the 3M rolls, but what is nice about these is that it helps when you want to layer, but still have dimension, but maybe not a lot of bulk...I used Deann's dots  HERE on the second card with the hydrangeas...and then used the 3M roll of adhesive for the lower half of the bow.

Again, thank you for taking a look!  Have a great weekend!  I added this card to The Casual Friday Blog
where everything is coming up PINK!  And it just happens the little baby who is getting baptized is a GIRL!  cfc58

It's time again to mail cards to my three aunts

They all live in the Seattle, WA, area...one will be 93 in a few weeks!! one will be 89 in the fall and the other will be 90 in December...I try to mail them a card once a month and include a letter about my family...my Dad, their brother and BIL lives here in Oregon along with my two brothers and their family.  (We are transplants from Washington way back when I was a sophomore in high school.)  And it is that time of the month again.  One aunt has a son who is a pilot and is in the military; he has been in Iraq and Afghanistan a lot..he is home right now, so she will get the card with the American Flags...I used all stamps from Friendship Jar:  Summer Fillers...I just have not played with that as much as I should (and my DH reminds me of that every time I get an order....why do you need more stamps?  why don't you use one of the hundreds you already own?)...geesh...he just doesn't get it!!  And the strip of stars at the top is washi tape (not called that.. at Michael's)...came in a packet of three...very patriotic colors.

Card number 2...is the hydrangea flowers...I stamped it on the Winter Wisteria paper and colored it in with different copics...the bow was from the same Friendship Jar filler set, I cut it out and colored it with copics.  I had to draw my own 'stem' lines in the water...the water is a copics color.  I added a strip of washi tape at the bottom (from Target).  I used "dots" for the dimensionals with the hydrangeas you can go HERE to see the dots they are posted on the right side of  Deanna's blog here.
And finally a jar filled with fresh Oregon strawberries...they are the BEST!  you can't tell, but I added some glossy accents to the single berry and the top berry in the jar...again a strip of washi tape at the bottom.

I think my aunts will enjoy the cards and I enjoyed making three different ones...(I get bored easily...mass producing is not my favorite thing to do!)

Thanks so much for taking a look...hope you all have a great weekend...we are getting rain (again) now that it is the weekend!

An "encouraging card"

I needed a card to say everything is going to be okay...and I wanted it to be a bit whimsical..not too mushy...for a young mom with three little ones...so I pulled out Tremendous Treats:  Birthday and used that cute little monkey and paired him up with the balloons from Heart 2 Heart...the sentiment is from Pretty Peonies.  The banner strips were made with washi tape from Target, I taped them onto a piece of cardstock and cut out the banner shape and adhered it with dimensional tape...the twig is from Little Bitty birds!
Thanks for taking a look!

Monday, June 18, 2012

Make It Monday #71: Bordered Sentiments Card # 3


I think I am liking this technique a LOT!  Of course it helps that all is quiet in the house...DH is at volleyball practice...no little's coming over to see Grandma...so that means I just get to play and get inky and let my mind roam...so I saw the sentiment from Half & Half ( I Often think of you and hope sunshine is shining upon you) so that thought took me to:  SUNSHINE! ...oh, the Back pocket basics has a sun shine...oh and..the Nativity Silhouettes Addition has a sunshine...let's see where this takes me...so I pulled out some Lemon Tart paper (I am loving this color)...and the new "kraft" ink cube that I bought and soon will be ordering the full size pad because I adore this color and know I will be using it a lot!  I stamped the sentiment and then I found a pen that would work...was thinking to myself...wouldn't it be great to have a "kraft" color ink pen!!  but what I had that wasn't black, white or silver, was a Staedtler triplus fineliner and it was a brown color!  So I carefully lined up my "metal straight edge" (I remembered!) and drew my lines.  Then I laid down some eclipse masking tape and stamped the sunshine (sunrise) stamp from the Nativity Silhouette Addition with summer sunrise ink.  I took a strip of kraft paper and stamped an image from Asian Fusion with summer sunrise ink and added a strip of the heart border die also in the summer sunrise paper.  I really like this card.  Hope  you enjoy it also!

Make It Monday #71: Bordered Sentiments Card # 2

This MIM is a nice way to showcase the larger sentiment stamps that we have...I thought of this one from Harvest Berries, it is actually the same design as the first card I made...this time I opted to add the line above and below the sentiment and not put any designer paper on the sides...it is really simple and nice.
I used berry sorbet ink and simply chartreuse...(note to self:  use a metal straight edge as the plastic one has little nicks in it!!)  Thank you for checking out the card.

Make It Monday #71: Bordered Sentiments

Betsy has a fabulous video for MIM this week.  Check it out HERE.  I decided to pull out a Christmas sentiment:  Stylish Sentiments:  Holiday and my Peaceful Poinsettia sets...the designer paper on the side is from Basic grey, Nordic Holiday.  Instead of drawing a line above and below the sentiment, I used the MS scoring tool to make the two lines.
Thanks for taking a look.

A happy Announcement

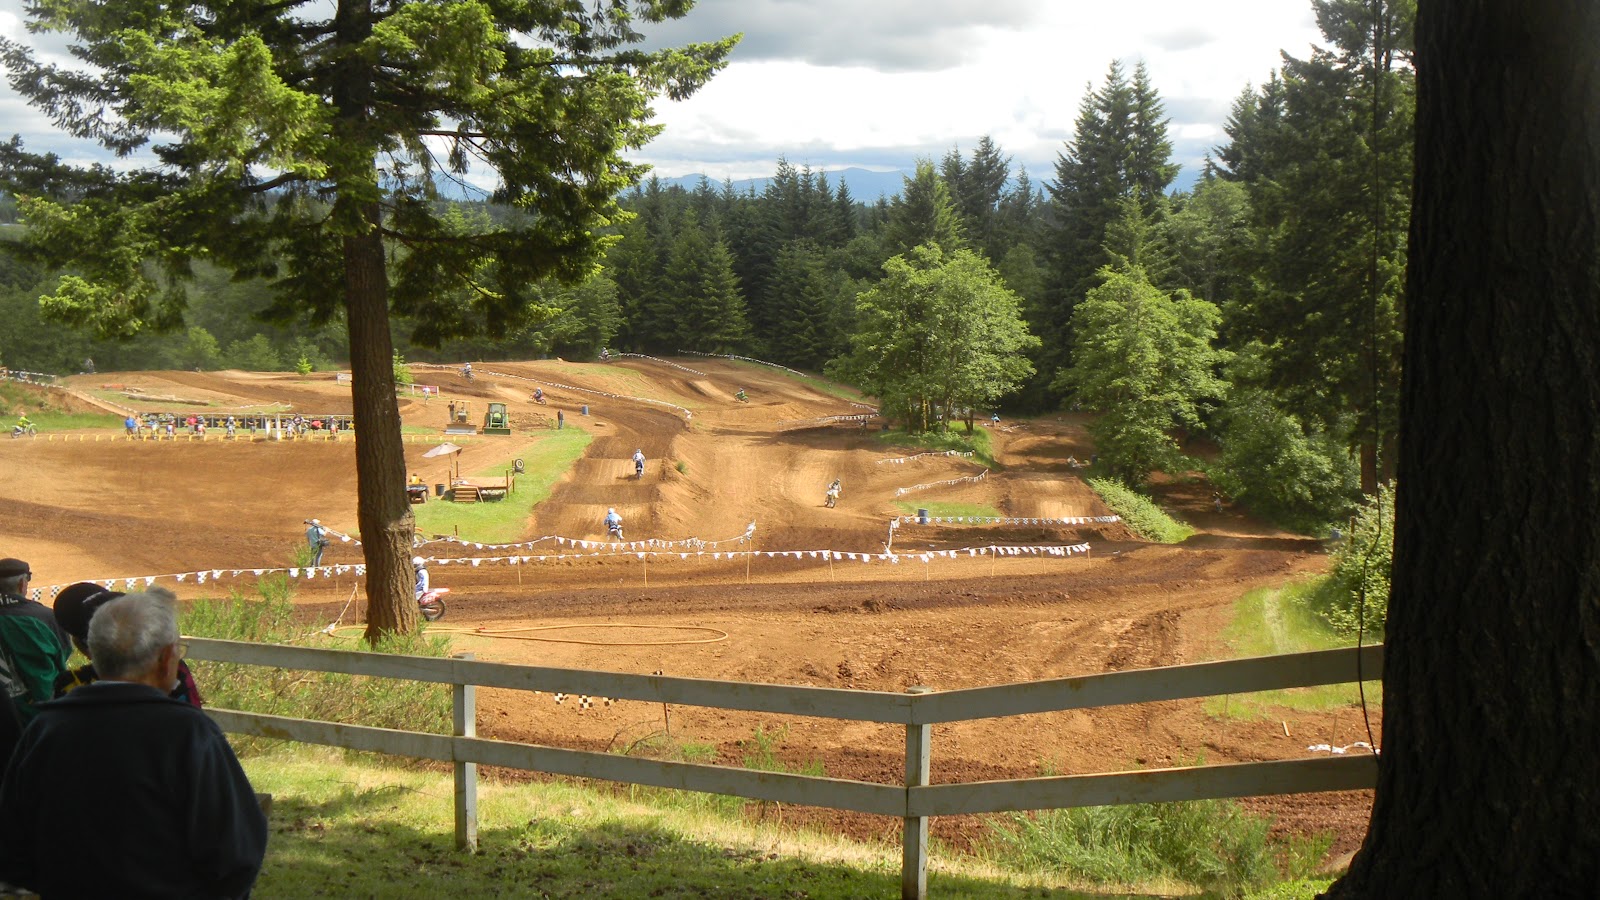
Yesterday my husband and I took my dad to my grandson's Motocross race...


Caleb will be 13 in September and this is his passion...hard for mom and grandma to watch!  But...he loves it...the good looking "young" man on the left is my dad...he will be 91!  I think he looks fabulous!  He had not seen Caleb race yet, so we decided to take him out to the track on Father's Day and let him experience this whole race thing!  I think he had a great time and really enjoyed watching Caleb.  My daughter, Lacey is sitting next to my dad, then her daughter Addie, next a friend, and finally SIL Aaron holding 3 year old Tristan...Caleb took third in both races we watched...now these pictures are leading up to the story and the card that I made....

My dad is now using a "cell phone"...no land line...the phone rings and he talks...gets off the phone and tells me that his grandson, Kyle, my nephew, just got engaged to his girl friend of 6 years!!  My older brother called with the news saying that he saw it on "Facebook"...Well, now we are excited...we love Elisa and think she will be great for Kyle...( we have been patiently waiting for him to pop the question)...then my other brother (father of Kyle) calls me today and I immediately tell him congratulations...there was a slight pause on his part...so I continued to say...now that he is going to have a daughter-in-law!  He asks how I heard about that...so of course I went into detail about the whole motocross racing, my dad getting a phone call...etc etc..and how my older brother saw it on facebook....Marty, the father of Kyle...said, "Well, I guess I better send off a text to Kyle because he and Elisa were planning to stop and visit my dad and tell him the news...I guess the social media is way to fast!"

So I pulled out my Tweet Talk birds and cas'd a card from HERE...as soon as I heard the words, I knew I wanted to say...a little bird told me...and Elisa is a HUGE fan of everything pink...in fact my nephew designed her ring...it is a black diamond with pink diamonds or at least pink gems around the main stone and then other smaller diamonds...he knew he needed to have something pink in her ring because she is such a fan of that color.  So here is the card that I am going to put in the mail for them...we are so happy and my SIL is beside happy...she loves this girls and is over joyed with this announcement!
of course the inside says:  you're engaged!  Congratulations!

Saturday, June 16, 2012

Another card cutting around the flower

I pulled out my Botanical Silhouettes and stamped the flower in red...then using my straight edge I cut a line and then used scissors to finish around the flowers.   HERE is where you can go to watch this technique.


I used a bit of copics because I didn't get a nice strong print with my ink...the ribbon is also from PTI.

Thanks for taking a look...gotta go babysit the grandkids now!


The Tweet Talk birds are talking "birthday"

I cas'd one of Erin's cards and this was very fun to do, she demonstrated the technique HERE, you will need to scroll down just a bit to see her drawings and how she added the nose to the bird...I used the chevron to make it look like a "hatched" egg!

A Super Star Dad

A simple card using the Super star stamps...I used the PTI wood Impression Plate after stamping my stars, I added a strip of washi tape that I picked up at Michael's...(three rolls for $2.99) and the sentiment Masculine Motif.

Thursday, June 14, 2012

Seeing Stars...off the page!


Two more cards from the technique on the Hero Arts Blog...I mentioned in the previous post that my daughter requested three cards to send to good friends, so I got right on that and made up three more...
thanks for taking another look..

A fun technique

Julie Ebersole had a video on the Hero Arts blog on Wednesday....you can go HERE to watch the video and see the technique...basically you take a stamp and stamp it close to the edge of the card, then using a straight edge, you cut off 1/4 inch, but leave what ever element is beyond the 1/4 inch.  KWIM??  The video will demonstrate it very clearly.  Julie also used an "envelope pattern" background stamp after she inked up her flowers.  Well, I do not have that background stamp, so this is what I did, first let me show you the card:
First I cut a cardstock 4.25 x 5.25 and I stamped the largest leaf print from Turning a New Leaf very close to the left edge (ripe avocado ink), then I added the flower fusion # 8 (berry sorbet).  I then lined up my card on a graph cutting board along with a ruler and my craft knife and cut straight down, but stopping when I got to a leaf...then continued cutting.  I used scissors to cut around the two leaf edges.  I added a strip of berry sorbet paper to the left edge and also cut 1/4 inch off the right side so the piece was 4 x 5.25.  I ran this piece through my die cutting machine, embossing it with a PTI plate (fine linen on one side and canvas on the other...the canvas side is the one I used).  I actually forgot to stamp my sentiment before embossing the paper, but it didn't seem to effect it any...I love this...so simple, yet a very dynamic look!

I wanted to do it again...so I pulled out my Super Stars set and started at the bottom with small stars and worked my way up with the largest stars...I went back and filled in with some super small stars..I used soft stone for the card front and summer sunrise, lemon tart, melon berry and ocean tide ink for the stars.  After cutting down the left side again I added a strip of melon berry paper and the sentiment from the same stamp set.  I placed it on Kraft cardstock.  My daughter really liked this card and asked if I would make her three to send to some very special girl friends...so that is what I am going to do right now!  Thanks for taking a look, check out the video and give it a try!  I think this next time I will cut down the right side and use some bolder colors!

Wednesday, June 13, 2012

More celebrations coming up

I made my list for cards that are needed soon..

1.  a retirement card for a receptionist at our doctor's office.  She has been there for over 30 years and we have been seeing him that long also...we started seeing him when we moved to West Linn and my husbands grandmother, Nana, moved in with us and we needed a doctor who made house calls...and he did!  So then our whole family started seeing him...and we still see him as do our daughters, their husbands and all their children.  We even got Scott's mom and dad to transfer to him Prior to their deaths this last 6 months)...it is so nice that he has come to know the whole family...and our stories!  We will be sad to see Glenda retire, but what joy for her...so many things to look forward to and I understand the first on her bucket list is a trip to Africa for mission work...we wish her the best.  One other side note about Glenda, she LOVES birds and has had feeders outside her office window all these years...so fun to watch the little goldfinch and all other beautiful birds...so of course I had to pull out Tweet Talk (mainly because that has a "retirement" sentiment in it...the only one I seem to own!)...and the doctor is the one who sent us a letter telling us about Glenda's last day of work and that she did NOT want a big party or send off...so of the course the handsome, male bird represents our doctor...I followed one of Melissa's cards to make this one...and I happen to have some great "bird paper" from My Minds Eye...fine and dandy...I used a strip of that and a heart border die along with a strip of glitter and a button...so cute, I think she will love the card.
 I will try to keep this one shorter...this next card is for a friend who is having three celebrations on one day...she and her husbands 40th anniversary, the baptism of her first grandchild and.....the 100th birthday of her MOM!!  I have made two, but still need a baptism card...
2.  A 100th birthday card.  My friends mom came from Chicago about four years ago when it became evident that she should not be living alone...since then she has lived with my friend.  Imagine!!  100 years old...and she is ONLY interested in LIVING!!  And of course she adores her knew little great grand daughter!  I used Aqua mist paper and stamped Happy Hydrangea on it (stamped off the paper once) also added some leaves stamped off once using spring moss...added some white little flower petals and embossed them.  The sentiment "celebrating" is from Inside & Out Birthday (I just taped over the other words before inking).  And wouldn't you know, today I received a PTI package with the numbers die AFTER I had made the card...I used my cricut to cut out the numbers.  I used the smaller die cut from the Happy hydrangea and inked it up with aqua mist.  The bow is NOT from the hydrangea set, it was a little too big for this flower, so I used the blow from Bells and Boughs...cut and stamped with Berry Sorbet ink.
3. 40th Anniversary card.  I know my friend has a peony in a pot on her front porch, so she will like this Pretty Peony card...I used fine linen paper for the card and stamped the flowers with Hero Hues latte chalk ink and then I stamped the flower with sweet blush ink. The 'happy anniversary' and the flower is all part of the Pretty Peonies stamp and die set.  Now I need to get inspired for a christening card for a baby girl!  Thanks for taking a look and spending time with my stories!  Have a great day!

Monday, June 11, 2012

A few new cards

The last several days I have been purging...you know how it is...you keep every single scrap of that coveted PTI paper and all the pattern paper too...well, enough is enough...NOT PTI...I do save every scrap of that paper, but I had some pp that was YEARS old...and just taking up space...so, I purged...Then when I die cut something, sometimes I cut more than one...more than two, more than three...you get the idea.  And it all goes into a plastic bin...then that gets filled up and I start filling another plastic bin...unfinished coloring, unfinished cards, backgrounds that have been done and that is all...so I went through it all...and you know, I found about 12 clouds...imagine that!  So now I am all organized and almost everything in it's place.  I have challenged myself to pull ONE thing out of the bin every time I come into the studio (yeah, I wonder how long that will last!!) and make a card with it...hopefully I will deplete my stock of unfinished cards...so actually the first card is the only one that I pulled from my stash...it is PTI's Vintage Picnic...yes I had already colored it, and even framed it with a Spellbinders Classic Scallop Square...so I pulled out my Wrought Iron background stamp and stamped away using Summer Sunrise...love yellow and red!
Next up are a couple of birthday cards and I used the Daydreamer flowers...

and the last two cards I would like your opinion...I used a Hampton Art stamp...stamped one with hibiscus burst on white, the other with blueberry sky on white, I then die cut a spellbinders Classic Scallop Square and adhered it behind the stamped imagine.  Then I took a shade lighter...Sweet blush and Spring Rain and I embossed Fancy Fourishes using ZING white embossing powder.  I love how that came out...I stamped a simple sentiment, but this is the thing...do I add ribbon?  ...a bow?....maybe just a folded ribbon on the sides?...this is my dilemma...I actually like the white bow, but then I thought with the fancy flourish embossed in white, I really wanted to highlight that and wasn't sure if adding ribbon would take away from the pretty embossing.  If you want to leave a comment and critique that for me, I would be really appreciative.  I know most of the time it is what "you like"...but do you think it would add to the card or not??

Thanks for taking a look and leaving me some comments...now that I see them posted here on the blog,Ii am wondering if I shouldn't have actually used a white card for my base and cut the colored paper just a tad smaller...????  Thanks friends!